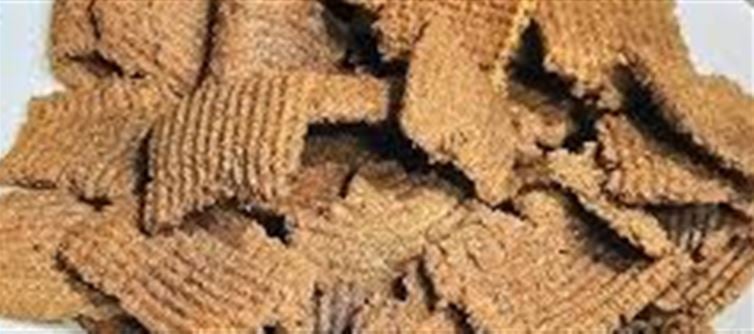
Ragi (finger millet) is a superfood that is rich in calcium, fiber, iron, and antioxidants. It is an excellent alternative to regular wheat or rice and offers a healthy way to snack. Making ragi chips at home is not only easy but also ensures that you can enjoy a crunchy, guilt-free treat without the added sugars or unhealthy fats found in store-bought snacks. Here’s a simple, healthy, and delicious recipe to make baked ragi chips at home!
Ingredients You’ll Need:
· Ragi flour (finger millet flour) – 1 cup
· Whole wheat flour – 1/2 cup (optional, helps with texture)
· Olive oil – 1-2 tbsp (or any oil of your choice like coconut or avocado oil)
· Salt – 1/2 tsp (adjust to taste)
· Cumin powder – 1/2 tsp (optional, adds flavor)
· Chili powder – 1/2 tsp (optional, for a spicy kick)
· Sesame seeds – 1 tbsp (optional, for added crunch)
· Water – as needed (to knead the dough)
· Black sesame seeds or carom seeds (ajwain) – for garnish (optional)
Instructions to Make Ragi Chips:
1. Prepare the Dough:
· In a large mixing bowl, combine ragi flour, whole wheat flour (if using), salt, cumin powder, and chili powder (if using).
· Add 1-2 tablespoons of oil to the dry ingredients. This helps in binding and gives the chips a crispy texture.
· Gradually add water to the mixture, little by little, until you get a smooth, soft dough. The dough should not be too sticky, so make sure you add water gradually and stop once it reaches the right consistency.
2. Rest the Dough:
· Cover the dough with a damp cloth and let it rest for about 15-20 minutes. This will help the dough to bind well and make it easier to roll out.
3. Roll the Dough:
· Preheat the oven to 180°C (350°F).
· After the dough has rested, divide it into small balls. Roll each ball into a thin flat disc using a rolling pin. The thinner, the better—aim for about 1-2 mm thickness. This ensures that the chips will be crisp once baked.
4. Cut into Shapes:
· Use a knife or a pizza cutter to cut the rolled-out dough into your preferred shape—triangles (like chips), squares, or even fun shapes like circles, depending on your choice.
5. Prepare the Baking Sheet:
· Line a baking tray with parchment paper to prevent the chips from sticking.
· Place the cut ragi chips on the baking sheet, ensuring they don’t overlap, so they cook evenly.
6. Baking:
· Lightly brush or spray the chips with olive oil for extra crispiness.
· Bake the ragi chips in the preheated oven for 12-15 minutes or until they turn golden brown and crisp up. Keep an eye on them to prevent burning, as oven temperatures can vary.
7. Cool and Serve:
· Once baked, remove the chips from the oven and allow them to cool completely. They will crisp up further as they cool.
· Optionally, sprinkle some black sesame seeds or carom seeds (ajwain) on top for additional flavor and crunch.
Tips for Perfect Ragi Chips:
· Flavor Variations: Feel free to experiment with different spices. You can add garlic powder, oregano, paprika, or herbs like rosemary or thyme to give your ragi chips unique flavors.
· Texture Adjustment: If the dough feels too dry, add a teaspoon of water at a time. If it’s too sticky, add a little more flour until the desired consistency is reached.
· Oil-Free Option: If you want to skip the oil for a lower-fat version, you can skip brushing the chips with oil and bake them as they are. The chips may be slightly less crispy but still healthy and delicious.
· Storage: Store the cooled chips in an airtight container for up to 1-2 weeks. Make sure they are completely cooled before storing to prevent them from becoming soft.
Why Choose Ragi Chips?
1. Nutritional Powerhouse: Ragi is high in calcium (good for bones), fiber (good for digestion), and iron (important for blood health). It’s a great option for those looking to boost their mineral intake in a tasty way.
2. Gluten-Free Option: Ragi is naturally gluten-free, making it an excellent snack for people with gluten sensitivities or those following a gluten-free diet.
3. Low Glycemic Index: Ragi has a low glycemic index, making it a better option for those managing their blood sugar levels, such as individuals with diabetes.
4. Versatile: These chips can be eaten on their own or paired with dips like hummus, guacamole, or yogurt-based dips for added flavor.
Conclusion: A Healthy Snack with a Crunch
Making ragi chips at home is a fantastic way to incorporate more nutritious foods into your diet without compromising on taste. These chips are not only healthy but also highly customizable based on your spice and flavor preferences. Plus, baking instead of frying means you get all the crunch and none of the guilt!
Give this recipe a try and enjoy a healthy, crunchy snack that you can feel good about. Whether you’re looking for a snack to munch on in the afternoon or a healthier alternative to store-bought chips, ragi chips are a winning choice.
Disclaimer:
The views and opinions expressed in this article are those of the author and do not necessarily reflect the official policy or position of any agency, organization, employer, or company. All information provided is for general informational purposes only. While every effort has been made to ensure accuracy, we make no representations or warranties of any kind, express or implied, about the completeness, reliability, or suitability of the information contained herein. Readers are advised to verify facts and seek professional advice where necessary. Any reliance placed on such information is strictly at the reader’s own risk..jpg)


 click and follow Indiaherald WhatsApp channel