


Pav, the soft and fluffy bread rolls, are a staple in indian households, especially in maharashtra and Gujarat, and they pair perfectly with tea, curries, or street-food favorites like pav bhaji and vada pav. While store-bought pav is convenient, making it at home ensures freshness, softness, and the satisfaction of crafting your own bread. Here’s a comprehensive guide to preparing homemade pav that’s perfect for tea-time indulgence.
Ingredients You’ll Need
· All-purpose flour (maida): 2 cups
· Instant yeast: 1 teaspoon
· Sugar: 1 tablespoon
· Salt: ½ teaspoon
· Warm milk or water: ¾ cup
· Butter or oil: 2 tablespoons
· Milk (for brushing): 2 tablespoons
Step-by-Step Preparation
1. Activate the Yeast
1. In a small bowl, combine warm milk (or water), sugar, and yeast.
2. Stir gently and let it sit for 5–10 minutes until frothy. This indicates the yeast is active.
2. Prepare the Dough
1. In a large mixing bowl, combine all-purpose flour and salt.
2. Make a well in the center and pour in the yeast mixture and butter.
3. Mix gradually, forming a soft, pliable dough.
4. Knead the dough for 8–10 minutes until smooth and elastic.
3. First Proofing
1. Place the dough in a lightly greased bowl and cover with a damp cloth.
2. Let it rest in a warm place for 1–1.5 hours or until it doubles in size.
4. Shape the Pav
1. Punch down the dough to release air.
2. Divide it into equal portions (about 8–10 pieces).
3. Shape each portion into smooth, round balls.
5. Second Proofing
1. Place the shaped dough balls in a greased baking tray, leaving a little space between them.
2. Cover and let them rise for another 30–40 minutes until puffy.
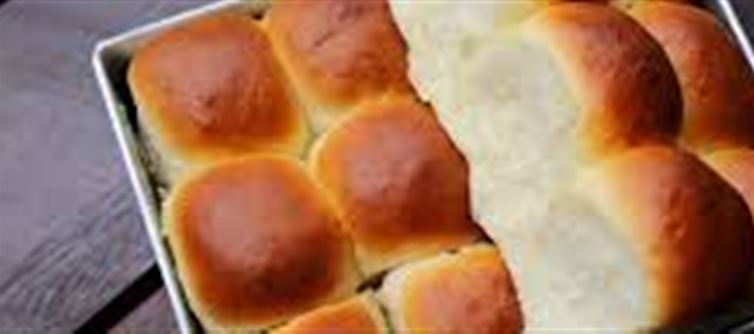
6. Baking the Pav
1. Preheat the oven to 180°C (350°F).
2. Brush the tops of the dough balls with milk for a golden finish.
3. Bake for 15–20 minutes or until the tops are lightly golden and the pav sounds hollow when tapped.
7. Serving Suggestions
· Serve warm with butter for a simple tea-time treat.
· Pair with vada pav, pav bhaji, or a spicy curry.
· Cut and toast them lightly for sandwiches or bruschetta-style snacks.
Tips for Perfect Pav
· Softness factor: Kneading and proper proofing are key to soft, fluffy pav.
· Milk brushing: Gives a beautiful golden sheen and slight richness to the bread.
· Alternative flours: For a healthier version, you can substitute half of the all-purpose flour with whole wheat flour.
· Storage: Homemade pav stays fresh for 1–2 days at room temperature. Store in an airtight container or freeze for longer shelf life.
Nutritional Benefits
· Energy-rich: Pav provides carbohydrates for energy, making it a perfect accompaniment to snacks or meals.
· Customizable: By making pav at home, you can control sugar, salt, and fat content.
· Homemade freshness: Avoids preservatives often found in store-bought pav.
Final Thoughts
Homemade pav is soft, fluffy, and utterly satisfying—a perfect companion for tea-time indulgences. From simple buttered pav to elaborate snacks like vada pav and pav bhaji, freshly baked bread elevates any meal. By following this simple recipe, you can enjoy fresh, flavorful pav in the comfort of your home, delighting both family and guests.
Disclaimer:
The views and opinions expressed in this article are those of the author and do not necessarily reflect the official policy or position of any agency, organization, employer, or company. All information provided is for general informational purposes only. While every effort has been made to ensure accuracy, we make no representations or warranties of any kind, express or implied, about the completeness, reliability, or suitability of the information contained herein. Readers are advised to verify facts and seek professional advice where necessary. Any reliance placed on such information is strictly at the reader’s own risk.
 click and follow Indiaherald WhatsApp channel